> ## Documentation Index
> Fetch the complete documentation index at: https://docs-dev-actions-triggers-prototype.mintlify.site/llms.txt
> Use this file to discover all available pages before exploring further.
> Instructions on how to bulk import and export user data into Auth0 using the Dashboard.
# Bulk User Import / Export
To use this feature, you must have **Editor - Users** or **Admin** permissions. For more information about Dashboard roles, read [Dashboard Access by Role](/docs/get-started/manage-dashboard-access/feature-access-by-role).
You can bulk import and export user data into Auth0 using the Dashboard. Bulk imports and exports are useful for migrating users from an existing database to Auth0 or from Auth0 to a different service. All jobs initiated through the Dashboard are logged and tracked by job IDs.
For a list of user profile fields that can be imported and exported, read [User Profiles](/docs/manage-users/user-accounts/user-profiles).
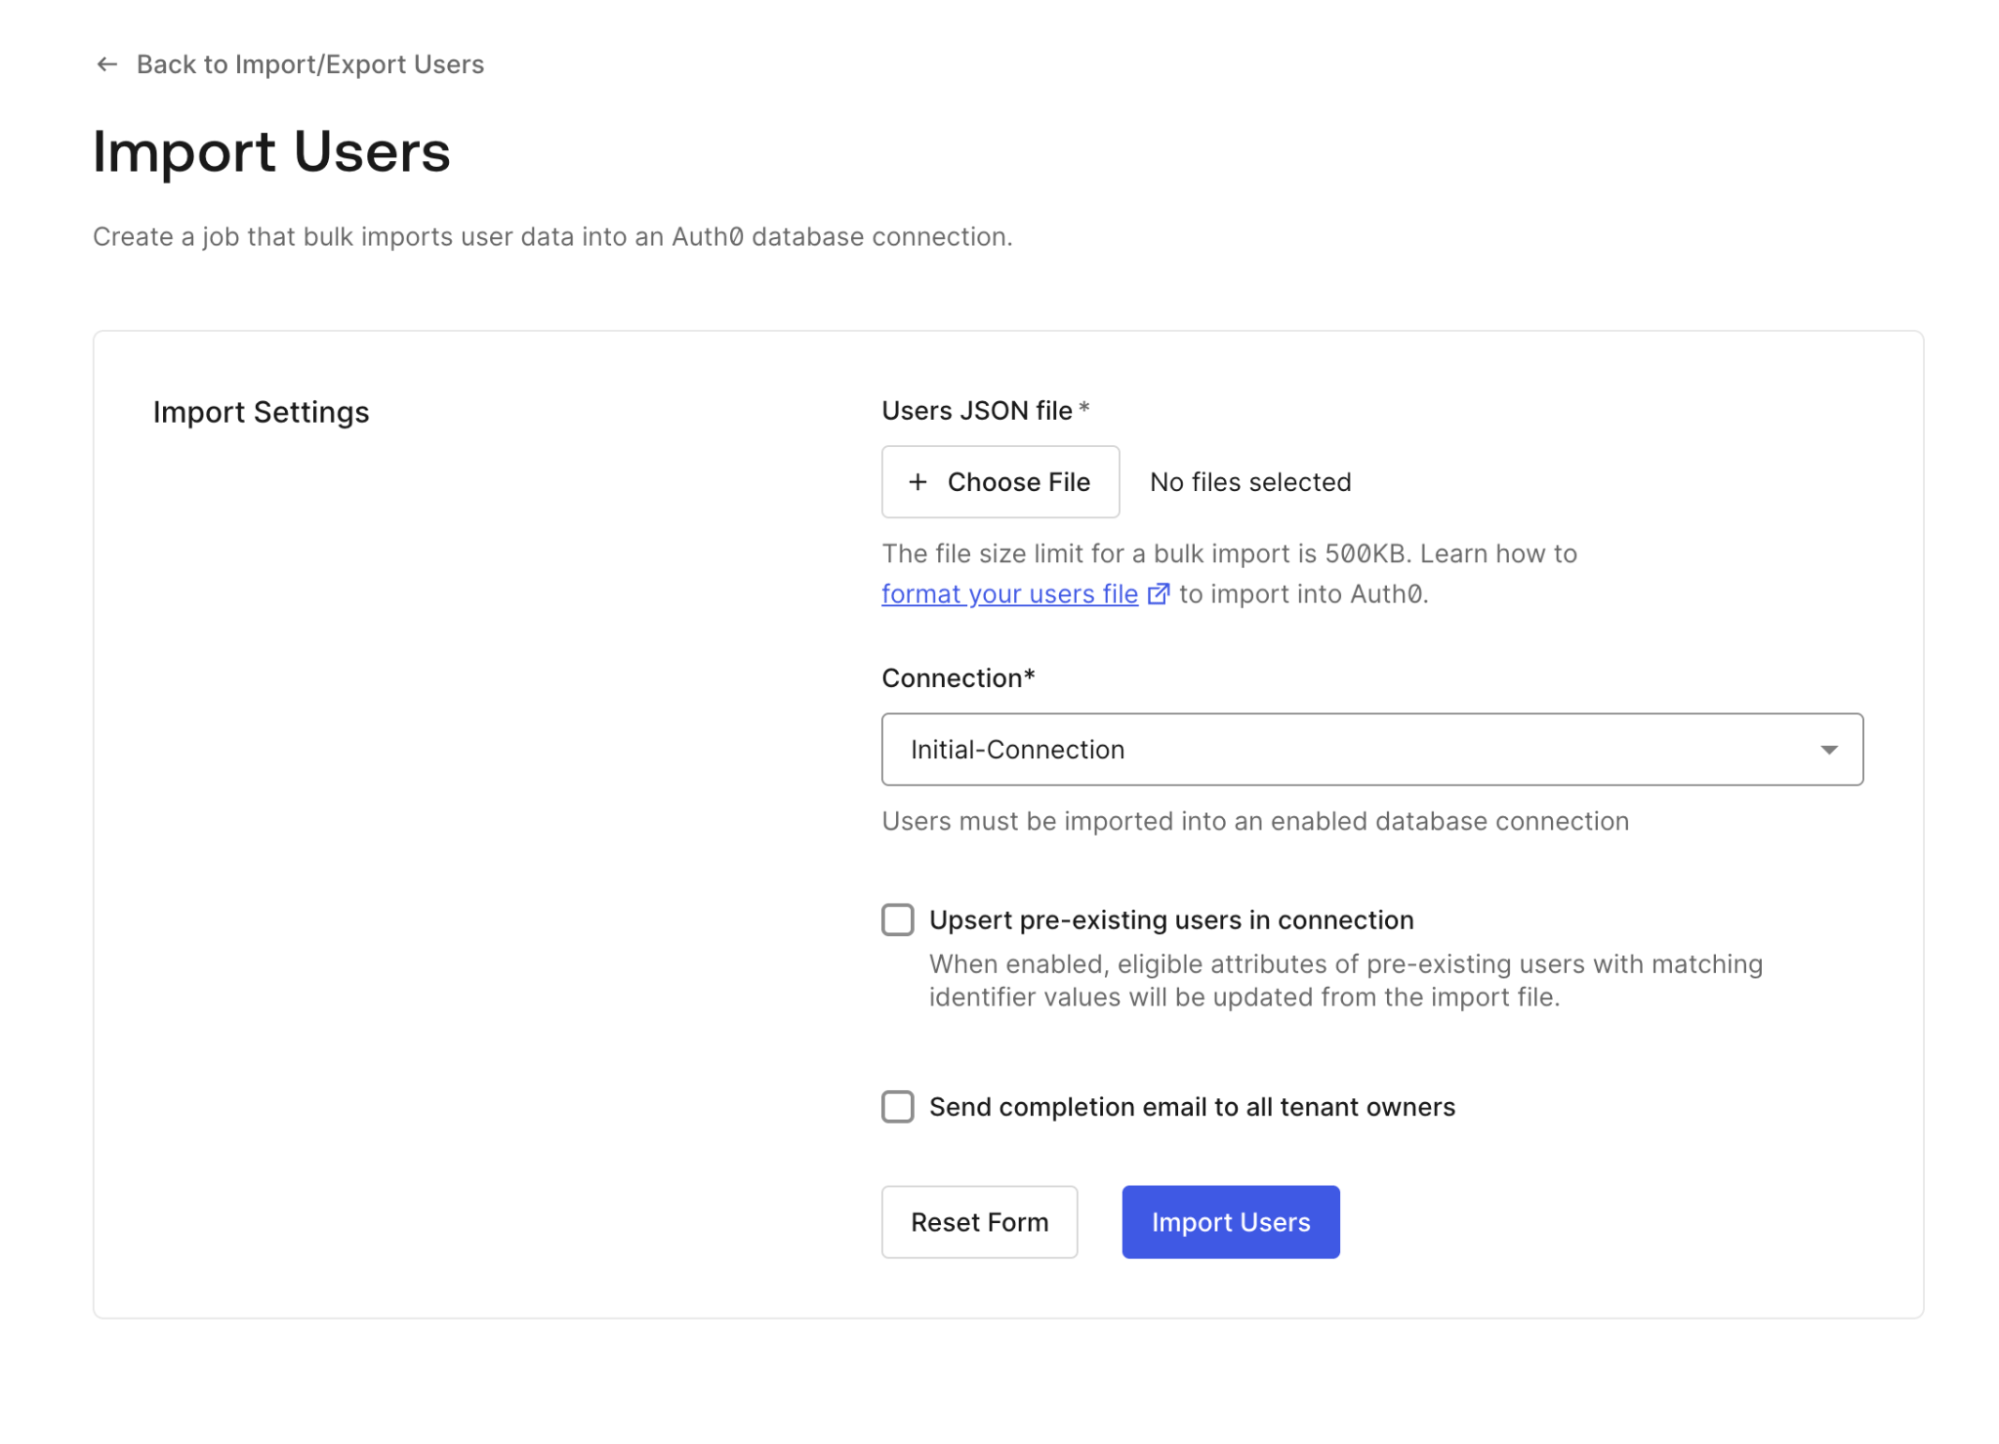
### Import users
To import users to your tenant:
1. In the Auth0 Dashboard, go to [**User Management > Users**](https://manage.auth0.com/#/users). If no users exist in your tenant, choose **Import Users**. If users exist, choose **Import/Export Users > Import Users**.
2. Upload a JSON file (maximum file size 500kb) formatted to the [specifications found here](/docs/manage-users/user-migration/bulk-user-import-database-schema-and-examples).
3. Select the database connection to import users into, noting that only database connections are supported and the custom database you choose must have import mode enabled for at least one application.
1. (Optional) Select **Upsert pre-existing users in connection** to update existing users with matching identifiers
2. (Optional) Select **Send completion email to all tenant owners**.
4. Choose **Import Users** to submit the job. Only submit one job per import submission.
To monitor the jobs you submitted, go to **View Jobs** on the Import/Export Users screen and choose **More info** on any job. Job statuses include **Job creation failed**, **Job created, user import failed**, and **Job created, user import succeeded**.
 ### Export users
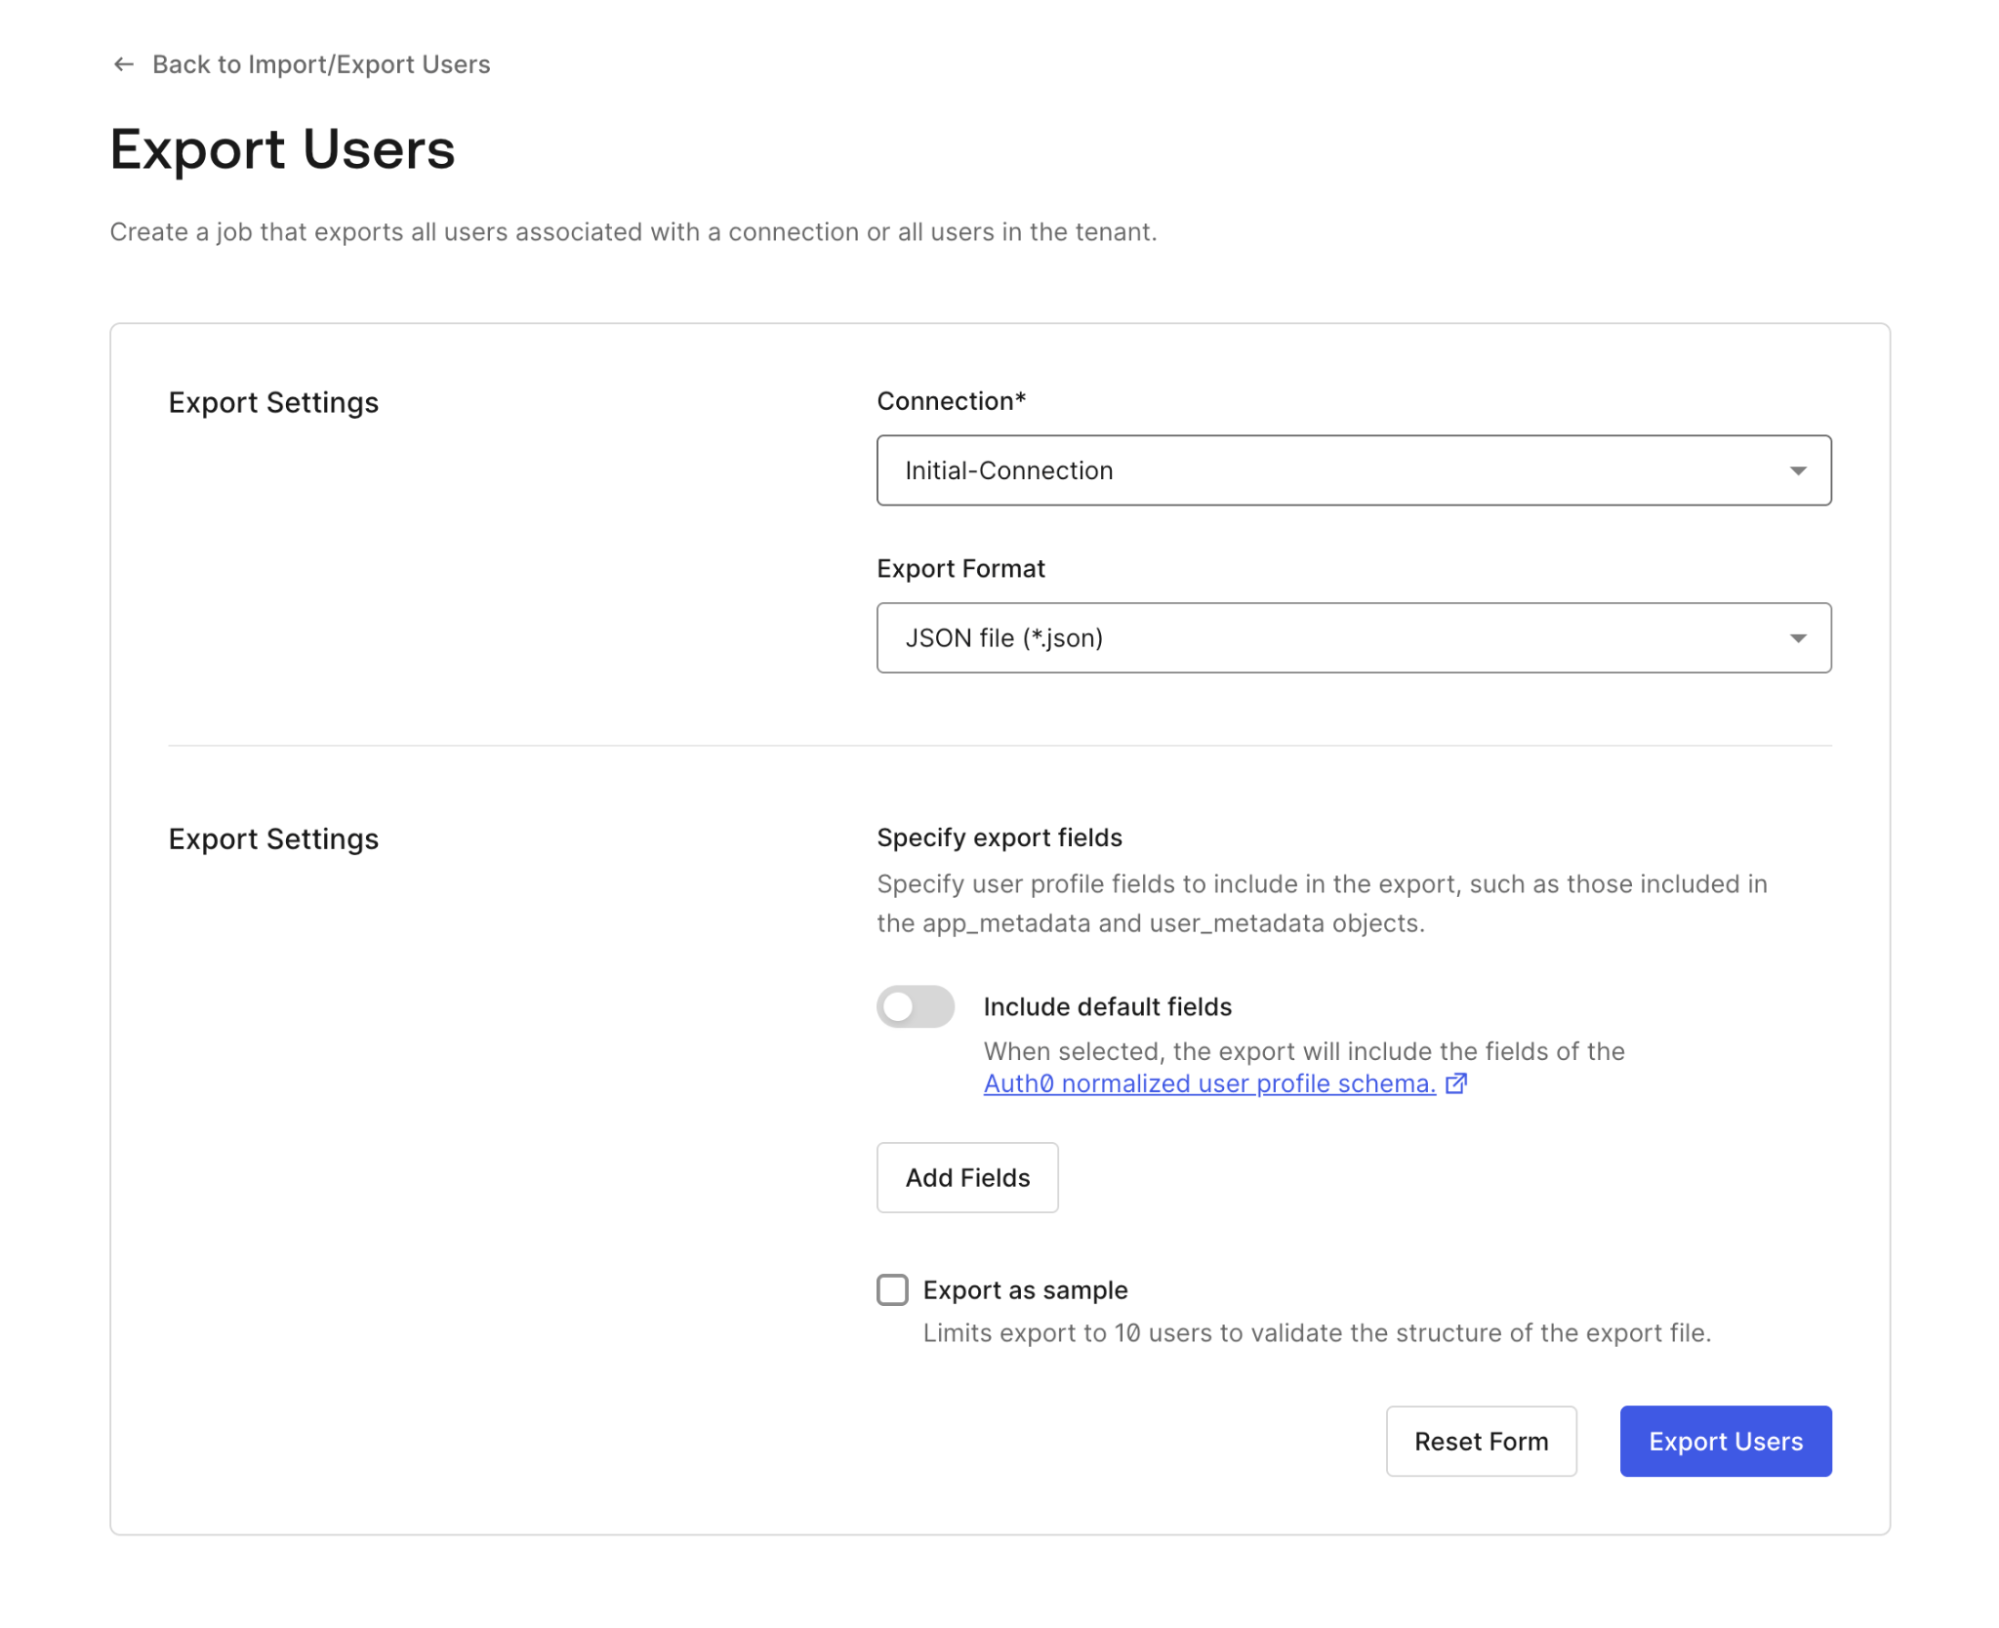 To export users from your tenant:
1. In the Dashboard, go to **User Management > Users,** then choose **Import/Export Users > Export Users**.
2. Select the database connection you want to export users from and choose JSON or CSV for your export format.
3. Specify which fields to export:
1. Choose **Add default fields** to include standard user attributes.
2. Update field names for your output file.
3. Add custom user attributes as needed.
4. (Optional) Select **Export as sample** to preview the structure with up to 10 users.
5. Select **Export Users** to submit the job.
To monitor and download export jobs, go to **View jobs** in the **Import/Export Users** screen. Choose **Check Status** to monitor job progress, **Download export** to retrieve the result, or **More info** to review errors or job metadata.
### Update user profiles
The [Auth0 Management API](https://auth0.com/docs/api/management/v2/users/patch-users-by-id) allows bulk user profile updates to `user_metadata` and `app_metadata`.
This process can result in data loss; always create a backup of your user database in the event of data corruption. In addition, this process cannot block multiple users and each user must be blocked individually in the Auth0 Dashboard or with the [Auth0 Management API](https://auth0.com/docs/api/management/v2/users/patch-users-by-id).
To bulk-update user profiles:
1. Using the export process above, create a complete export file including all your user attributes.
2. Choose JSON format for your export.
3. When the export is complete, download the file containing your users.
###
### Update your configuration
Do not change the user email address because it is the lookup key for users in the database.
Make a copy of the JSON file you downloaded in the previous step, then open the copy of the JSON file in a text editor. Your user schema should be similar to the one below:
```json lines expandable theme={null}
[
{
"Id":"auth0|626737a9813c000069daf462",
"Nickname":"testuser1",
"Name":"testuser1@auth0.com",
"email":"testuser1@auth0.com",
"Connection":"Username-Password-Authentication",
"Created At":"2022-04-26T00:07:05.098Z",
"Updated At":"2022-07-06T14:54:19.214Z"
},
{
"Id":"auth0|62d1a1853bdcf11ff5dca672",
"Nickname":"testuser2",
"Name":"testuser2@auth0.com",
"email":"testuser2@auth0.com",
"Connection":"Username-Password-Authentication",
"Created At":"2022-07-15T17:19:01.531Z",
"Updated At":"2022-07-15T17:19:01.532Z"
},
{
"Id":"auth0|62d1a1a524f32a4185c9ce23",
"Nickname":"testuser3",
"Name":"testuser3@auth0.com",
"email":"testuser3@auth0.com",
"Connection":"Username-Password-Authentication",
"Created At":"2022-07-15T17:19:33.484Z",
"Updated At":"2022-07-15T17:19:33.484Z"
}
]
```
The Id must have a unique `connection|id`. If the same user Id exists in multiple connections, your update will fail.
To add an attribute, create a new field in each user schema and update with a value. In the example below, the **Family Name** attribute has a value of **Smith** with a comma after the new attribute value.
You can also add the `email_verified` attribute to multiple users and set the value to `true`.
```json lines theme={null}
{
"Id":"auth0|626737a9813c000069daf462",
"Nickname":"testuser1",
"Family Name":"Smith",
"Name":"testuser1@auth0.com",
"email":"testuser1@auth0.com",
"email_verified":true,
"Connection":"Username-Password-Authentication",
"Created At":"2022-04-26T00:07:05.098Z",
"Updated At":"2022-07-06T14:54:19.214Z"
}
```
Save the changes to your user file.
This process cannot block multiple users. You must block users individually in the Auth0 Dashboard or with the [Auth0 Management API](https://auth0.com/docs/api/management/v2#!/Users/patch_users_by_id).
To import updated user profile data, upload your updated user profile file and update several users in one job. **Upsert pre-existing users in connection** must be true/selected for existing users to be updated.
To export users from your tenant:
1. In the Dashboard, go to **User Management > Users,** then choose **Import/Export Users > Export Users**.
2. Select the database connection you want to export users from and choose JSON or CSV for your export format.
3. Specify which fields to export:
1. Choose **Add default fields** to include standard user attributes.
2. Update field names for your output file.
3. Add custom user attributes as needed.
4. (Optional) Select **Export as sample** to preview the structure with up to 10 users.
5. Select **Export Users** to submit the job.
To monitor and download export jobs, go to **View jobs** in the **Import/Export Users** screen. Choose **Check Status** to monitor job progress, **Download export** to retrieve the result, or **More info** to review errors or job metadata.
### Update user profiles
The [Auth0 Management API](https://auth0.com/docs/api/management/v2/users/patch-users-by-id) allows bulk user profile updates to `user_metadata` and `app_metadata`.
This process can result in data loss; always create a backup of your user database in the event of data corruption. In addition, this process cannot block multiple users and each user must be blocked individually in the Auth0 Dashboard or with the [Auth0 Management API](https://auth0.com/docs/api/management/v2/users/patch-users-by-id).
To bulk-update user profiles:
1. Using the export process above, create a complete export file including all your user attributes.
2. Choose JSON format for your export.
3. When the export is complete, download the file containing your users.
###
### Update your configuration
Do not change the user email address because it is the lookup key for users in the database.
Make a copy of the JSON file you downloaded in the previous step, then open the copy of the JSON file in a text editor. Your user schema should be similar to the one below:
```json lines expandable theme={null}
[
{
"Id":"auth0|626737a9813c000069daf462",
"Nickname":"testuser1",
"Name":"testuser1@auth0.com",
"email":"testuser1@auth0.com",
"Connection":"Username-Password-Authentication",
"Created At":"2022-04-26T00:07:05.098Z",
"Updated At":"2022-07-06T14:54:19.214Z"
},
{
"Id":"auth0|62d1a1853bdcf11ff5dca672",
"Nickname":"testuser2",
"Name":"testuser2@auth0.com",
"email":"testuser2@auth0.com",
"Connection":"Username-Password-Authentication",
"Created At":"2022-07-15T17:19:01.531Z",
"Updated At":"2022-07-15T17:19:01.532Z"
},
{
"Id":"auth0|62d1a1a524f32a4185c9ce23",
"Nickname":"testuser3",
"Name":"testuser3@auth0.com",
"email":"testuser3@auth0.com",
"Connection":"Username-Password-Authentication",
"Created At":"2022-07-15T17:19:33.484Z",
"Updated At":"2022-07-15T17:19:33.484Z"
}
]
```
The Id must have a unique `connection|id`. If the same user Id exists in multiple connections, your update will fail.
To add an attribute, create a new field in each user schema and update with a value. In the example below, the **Family Name** attribute has a value of **Smith** with a comma after the new attribute value.
You can also add the `email_verified` attribute to multiple users and set the value to `true`.
```json lines theme={null}
{
"Id":"auth0|626737a9813c000069daf462",
"Nickname":"testuser1",
"Family Name":"Smith",
"Name":"testuser1@auth0.com",
"email":"testuser1@auth0.com",
"email_verified":true,
"Connection":"Username-Password-Authentication",
"Created At":"2022-04-26T00:07:05.098Z",
"Updated At":"2022-07-06T14:54:19.214Z"
}
```
Save the changes to your user file.
This process cannot block multiple users. You must block users individually in the Auth0 Dashboard or with the [Auth0 Management API](https://auth0.com/docs/api/management/v2#!/Users/patch_users_by_id).
To import updated user profile data, upload your updated user profile file and update several users in one job. **Upsert pre-existing users in connection** must be true/selected for existing users to be updated.