> ## Documentation Index
> Fetch the complete documentation index at: https://docs-dev-actions-triggers-prototype.mintlify.site/llms.txt
> Use this file to discover all available pages before exploring further.
# IDプロバイダーのAPIを呼び出すためにスコープ/権限を追加する
> IdP接続にスコープを追加する方法について説明します。
export const AuthCodeBlock = ({filename, icon, language, highlight, children}) => {
const [displayText, setDisplayText] = useState(children);
const [copyText, setCopyText] = useState(children);
const wrapperRef = React.useRef(null);
useEffect(() => {
let unsubscribe = null;
function init() {
if (!window.autorun || !window.rootStore) {
return;
}
unsubscribe = window.autorun(() => {
let processedChildrenForDisplay = children;
let processedChildrenForCopy = children;
for (const [key, value] of window.rootStore.variableStore.values.entries()) {
const escapedKey = key.replaceAll(/[.*+?^${}()|[\]\\]/g, (String.raw)`\$&`);
let displayValue = value;
if (key === "{yourClientSecret}" && value !== "{yourClientSecret}") {
displayValue = value.substring(0, 3) + "*****MASKED*****";
}
processedChildrenForDisplay = processedChildrenForDisplay.replaceAll(new RegExp(escapedKey, "g"), displayValue);
processedChildrenForCopy = processedChildrenForCopy.replaceAll(new RegExp(escapedKey, "g"), value);
}
setDisplayText(processedChildrenForDisplay);
setCopyText(processedChildrenForCopy);
});
}
if (window.rootStore) {
init();
} else {
window.addEventListener("adu:storeReady", init);
}
return () => {
window.removeEventListener("adu:storeReady", init);
unsubscribe?.();
};
}, [children]);
useEffect(() => {
if (!wrapperRef.current) return;
const originalWriteText = navigator.clipboard.writeText.bind(navigator.clipboard);
let isOverriding = false;
const handleClick = e => {
const button = e.target.closest('[data-testid="copy-code-button"]');
if (!button || !wrapperRef.current.contains(button)) return;
isOverriding = true;
navigator.clipboard.writeText = text => {
if (isOverriding) {
isOverriding = false;
navigator.clipboard.writeText = originalWriteText;
return originalWriteText(copyText);
}
return originalWriteText(text);
};
setTimeout(() => {
if (isOverriding) {
isOverriding = false;
navigator.clipboard.writeText = originalWriteText;
}
}, 100);
};
const wrapper = wrapperRef.current;
wrapper.addEventListener('click', handleClick, true);
return () => {
wrapper.removeEventListener('click', handleClick, true);
if (navigator.clipboard.writeText !== originalWriteText) {
navigator.clipboard.writeText = originalWriteText;
}
};
}, [copyText]);
return
{displayText}
;
};
ユーザーがログインすると、ユーザープロファイルを取得してから、関連付けられている`accessToken`を取得して、IDプロバイダー(IdP)のAPIを呼び出すことができます。これについては、「[IDプロバイダーのAPIを呼び出す](/docs/ja-jp/authenticate/identity-providers/calling-an-external-idp-api)」で説明されています。
しかし、IdPのAPI呼び出しで`Access Denied`(アクセス拒否)を受け取った場合には、ログインでユーザーの正しい権限が要求されていなかった可能性があります。正しい許可を要求するには、2つの方法があります。
## IDプロバイダーの設定を変更する
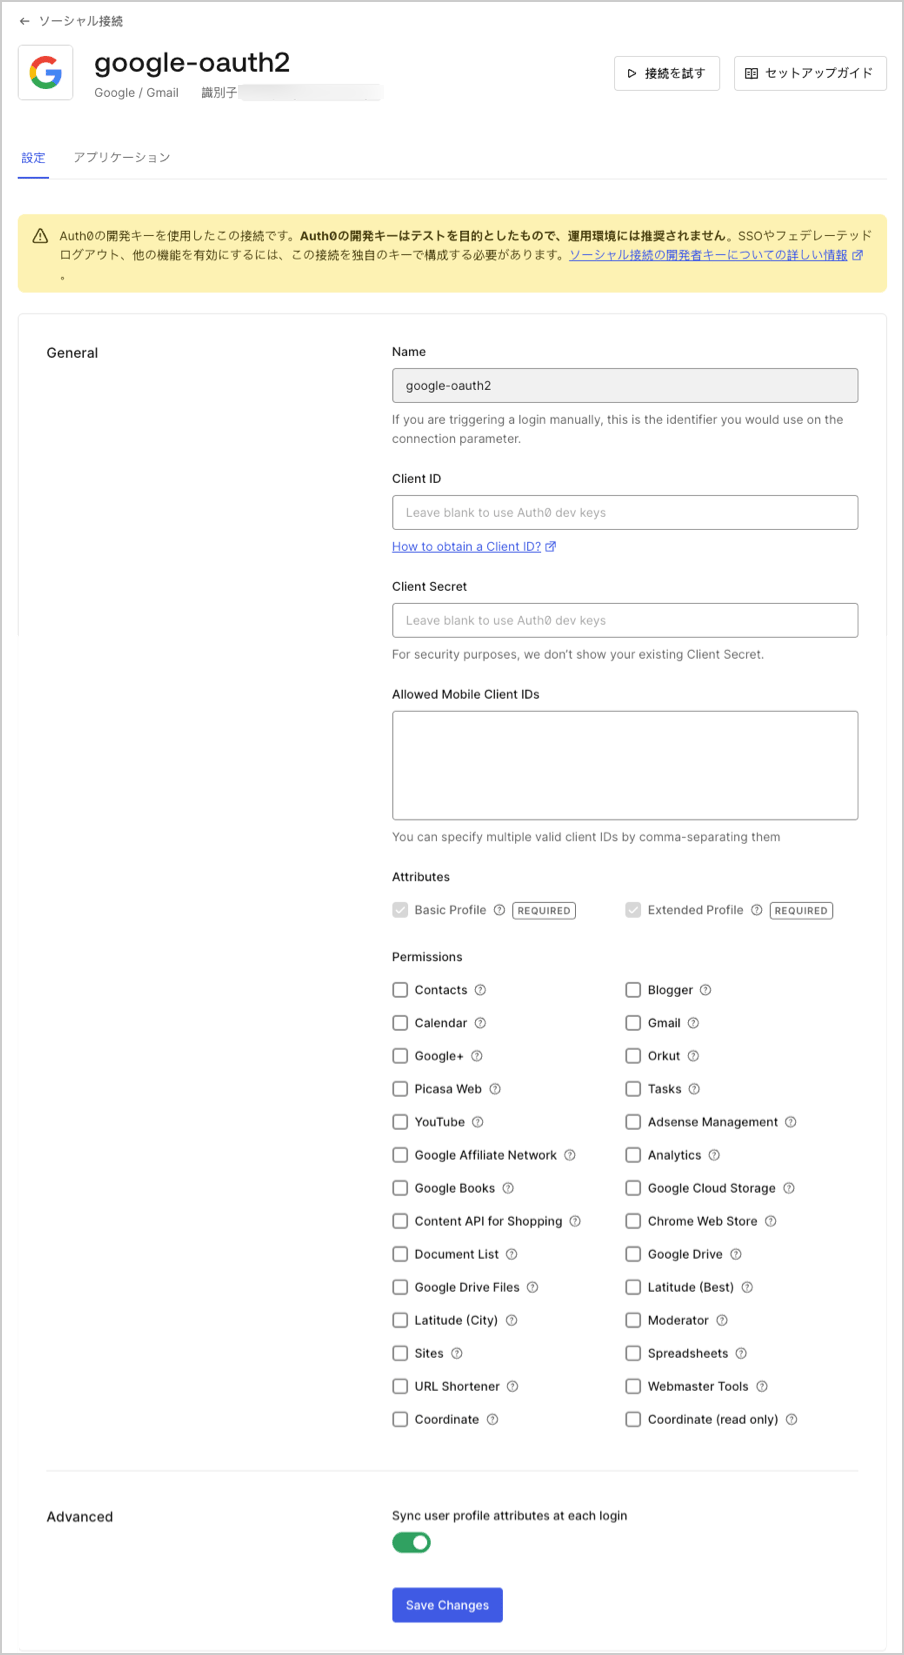
ユーザーからの必要なスコープ/権限を構成するには、[[Auth0 Dashboard]>[Authentication(認証)]>[Social(ソーシャル)]](https://manage.auth0.com/#/connections/social)に移動して、IdPを選択します。構成画面にあるリストから必要な権限を選択することができます。
たとえば、 **Google / Gmail** 接続を選択すると、Google特有の権限を構成することができます。
 ## スコープを認可エンドポイントに渡す
要求したいスコープ/権限をコンマ区切りのリストとして`connection_scope`パラメーターで渡し、[認可エンドポイント](/docs/ja-jp/api/authentication#login)を呼び出すこともできます。たとえば、Googleからのスコープ「`https://www.googleapis.com/auth/contacts.readonly`」と「`https://www.googleapis.com/auth/analytics`」を要求したい場合には、これらを`connection`パラメーターとして渡し、ユーザーが確実に自分のGoogleアカウントでログインするようにします。
export const codeExample = `https://{yourDomain}/authorize
?response_type=id_token
&client_id={yourClientId}
&redirect_uri={https://yourApp/callback}
&scope=openid%20profile
&connection=google-oauth2
&connection_scope=https%3A%2F%2Fwww.googleapis.com%2Fauth%2Fanalytics%2Chttps%3A%2F%2Fwww.googleapis.com%2Fauth%2Fcontacts.readonly
&nonce=abc`;
上記の要求例では、`connection_scope`パラメーターの値がURLエンコードされています。Googleには次のようにデコードされた値が渡されます:`https://www.googleapis.com/auth/analytics, https://www.googleapis.com/auth/contacts.readonly`
## スコープを認可エンドポイントに渡す
要求したいスコープ/権限をコンマ区切りのリストとして`connection_scope`パラメーターで渡し、[認可エンドポイント](/docs/ja-jp/api/authentication#login)を呼び出すこともできます。たとえば、Googleからのスコープ「`https://www.googleapis.com/auth/contacts.readonly`」と「`https://www.googleapis.com/auth/analytics`」を要求したい場合には、これらを`connection`パラメーターとして渡し、ユーザーが確実に自分のGoogleアカウントでログインするようにします。
export const codeExample = `https://{yourDomain}/authorize
?response_type=id_token
&client_id={yourClientId}
&redirect_uri={https://yourApp/callback}
&scope=openid%20profile
&connection=google-oauth2
&connection_scope=https%3A%2F%2Fwww.googleapis.com%2Fauth%2Fanalytics%2Chttps%3A%2F%2Fwww.googleapis.com%2Fauth%2Fcontacts.readonly
&nonce=abc`;
上記の要求例では、`connection_scope`パラメーターの値がURLエンコードされています。Googleには次のようにデコードされた値が渡されます:`https://www.googleapis.com/auth/analytics, https://www.googleapis.com/auth/contacts.readonly`