> ## Documentation Index
> Fetch the complete documentation index at: https://docs-dev-actions-triggers-prototype.mintlify.site/llms.txt
> Use this file to discover all available pages before exploring further.
> Learn how to set up users, groups, roles, and permissions in the Authorization Extension Dashboard.
# Set Up Users in Authorization Extension Dashboard
Auth0 provides two ways to implement role-based access control (RBAC), which you can use in place of or in combination with your API's own internal access control system:
* [Authorization Core](/docs/manage-users/access-control/rbac)
* [Authorization Extension](/docs/customize/extensions/authorization-extension)
The Authorization Core feature set matches the functionality of the Authorization Extension, improves performance and scalability, and provides a more flexible RBAC system than the Authorization Extension.
Currently, both implement the key features of RBAC and allow you to restrict the custom scopes defined for an API to those that have been assigned to the user as permissions.
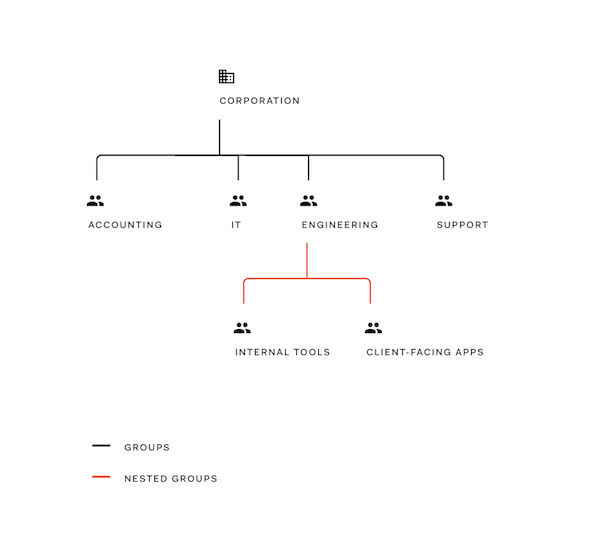
If you have an application that is accessible to everyone within your corporation, the **users** are the individuals to whom you'd like to grant access to your application. If you have a large number of users, managing the access rights and permissions for each one individually can become unwieldy. The **groups** functionality helps make this process easier. For example, your groups can reflect the various departments of your organization: accounting, information technology, engineering, support, and so on. You might also create nested groups, such as by dividing the engineering group into two nested groups: internal tools and client-facing applications. Your organization hierarchy therefore looks like this:
* Corporation
* Accounting
* Information Technology
* Engineering
* Internal Tools
* Client-Facing Applications
* Support
 You can add users to your groups manually or dynamically based on the Connection(s) they're using to access your application. For example, if someone logs in using the Active Directory Connection and their AD profile indicates that they're in the Marketing group, the Authorization Extension can also add them to the Marketing group you're managing with the extension.
Finally, we have permissions and roles, which are groups of permissions. The purpose of the latter is to make it easier to assign several permissions simultaneously to either a user or a group.
You can add users to your groups manually or dynamically based on the Connection(s) they're using to access your application. For example, if someone logs in using the Active Directory Connection and their AD profile indicates that they're in the Marketing group, the Authorization Extension can also add them to the Marketing group you're managing with the extension.
Finally, we have permissions and roles, which are groups of permissions. The purpose of the latter is to make it easier to assign several permissions simultaneously to either a user or a group.
 For example, you may want to grant permissions to:
* Approve requests for travel
* Approve travel expenses
Rather than assigning both permissions to groups/users, you can roll the two (along with many others) into a role called **Travel Administrator**. You can then assign Travel Administrator to individual users or to one or more groups.
For example, you may want to grant permissions to:
* Approve requests for travel
* Approve travel expenses
Rather than assigning both permissions to groups/users, you can roll the two (along with many others) into a role called **Travel Administrator**. You can then assign Travel Administrator to individual users or to one or more groups.
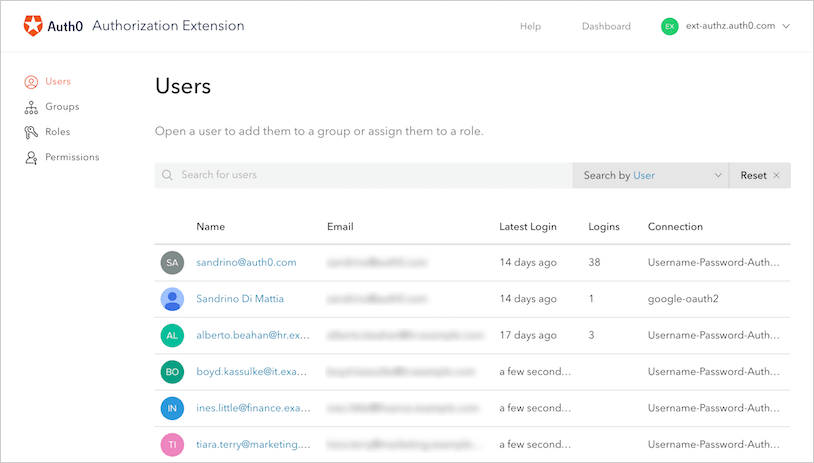
 ## Users
The **Users** section lists all the current users of your applications. Here you can find a specific user, see their profile, change their group affiliations, and change their roles.
## Users
The **Users** section lists all the current users of your applications. Here you can find a specific user, see their profile, change their group affiliations, and change their roles.
 ## Groups
To create and manage the groups with which you'll manage users' settings, click **Groups** in the Authorization Dashboard.
Click **Create Group** to create a new group for your users. You'll be asked to provide a **name** for the group, as well as a **description** for that group.
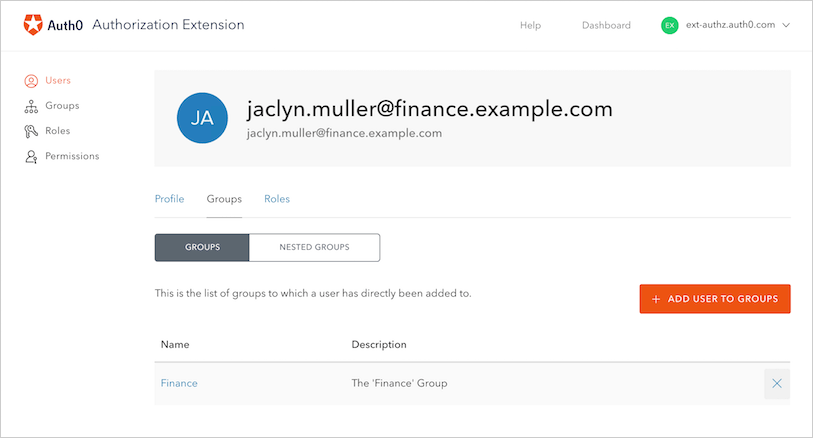
You can manage your users and their group affiliations in one of two ways:
* Opening the **group** and managing the group's users
## Groups
To create and manage the groups with which you'll manage users' settings, click **Groups** in the Authorization Dashboard.
Click **Create Group** to create a new group for your users. You'll be asked to provide a **name** for the group, as well as a **description** for that group.
You can manage your users and their group affiliations in one of two ways:
* Opening the **group** and managing the group's users
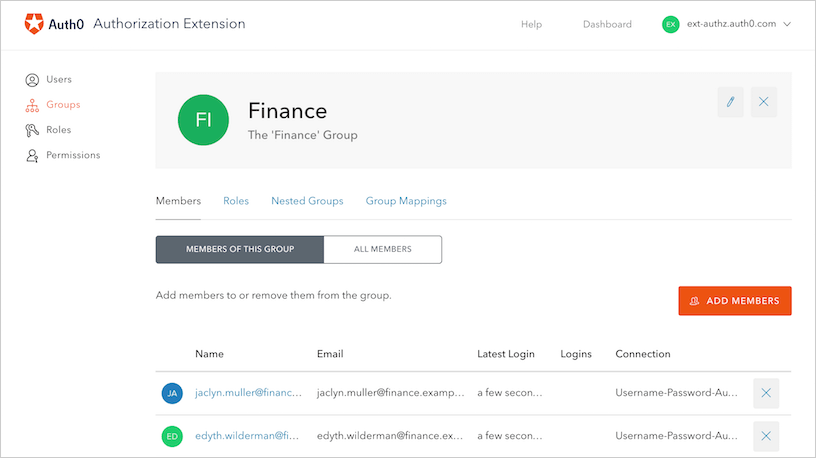 * Opening the **user** and managing the user's group membership(s)
 The groups you'll create are dependent on the needs of your business process. For example, you might have a group for your users in finance, a group for your users in IT, and so on. Additionally, you may create nested groups that are similar to the following:
* Example Company
* Accounting
* External Accountants
* Human Resources
* Finance
* Finance IT Support
* Management
To create nested groups, you must first create all of the individual groups via the **CREATE** button on the Groups page of the Authorization Dashboard.
To nest the groups:
1. Open up the top-level Group (in the example above, this would be the Example Company Group)
2. Click on the **Nested Groups** tab
3. Click on the **ADD NESTED GROUP** button. You will be presented with a list of Groups that can be added to the primary Group. To select a particular Group, click on the checkbox to the left of the name. After each selection, you will be returned to the primary group page. Continue this process until you have included all the Groups you need.
With nested groups, adding a user to a sub-group also grants the user permissions granted to the groups that are parents (and grandparents) of that group. For example, adding a user to the External Accountants group automatically makes them a member of the Finance and Company Groups. However, the user is only explicitly a member of External Accountants; all other memberships are purely dynamic and are calculated as needed (for example, when loading the user's group memberships).
To prevent confusion, you will be shown both the explicit members AND the "calculated members" that result from nested groups whenever you open a specific group's page in the Authorization Dashboard.
### Group mappings
Group Mappings allow you to dynamically add users to different Groups based on the users' Connections. Essentially, using the Connection and the groups information provided by the IdP, you can dynamically make the user a member of the group in which you've created the appropriate mapping.
For example, suppose your users are logging in using their Active Directory (AD) credentials. As part of their identity, AD allows users to have group information associated (such as "Administrative" and "Marketing").
You can then configure group mappings to look at a user's profile if they're connecting with the Active Directory connection. When the extension sees that the person is a part of the "Administrative" group, it will automatically make the user a member of your company's Admin group.
The groups you'll create are dependent on the needs of your business process. For example, you might have a group for your users in finance, a group for your users in IT, and so on. Additionally, you may create nested groups that are similar to the following:
* Example Company
* Accounting
* External Accountants
* Human Resources
* Finance
* Finance IT Support
* Management
To create nested groups, you must first create all of the individual groups via the **CREATE** button on the Groups page of the Authorization Dashboard.
To nest the groups:
1. Open up the top-level Group (in the example above, this would be the Example Company Group)
2. Click on the **Nested Groups** tab
3. Click on the **ADD NESTED GROUP** button. You will be presented with a list of Groups that can be added to the primary Group. To select a particular Group, click on the checkbox to the left of the name. After each selection, you will be returned to the primary group page. Continue this process until you have included all the Groups you need.
With nested groups, adding a user to a sub-group also grants the user permissions granted to the groups that are parents (and grandparents) of that group. For example, adding a user to the External Accountants group automatically makes them a member of the Finance and Company Groups. However, the user is only explicitly a member of External Accountants; all other memberships are purely dynamic and are calculated as needed (for example, when loading the user's group memberships).
To prevent confusion, you will be shown both the explicit members AND the "calculated members" that result from nested groups whenever you open a specific group's page in the Authorization Dashboard.
### Group mappings
Group Mappings allow you to dynamically add users to different Groups based on the users' Connections. Essentially, using the Connection and the groups information provided by the IdP, you can dynamically make the user a member of the group in which you've created the appropriate mapping.
For example, suppose your users are logging in using their Active Directory (AD) credentials. As part of their identity, AD allows users to have group information associated (such as "Administrative" and "Marketing").
You can then configure group mappings to look at a user's profile if they're connecting with the Active Directory connection. When the extension sees that the person is a part of the "Administrative" group, it will automatically make the user a member of your company's Admin group.
 ## Roles
The roles that you will create will depend on the access to certain permissions in your application. For example, let's say that you have an application that allows employees to enter in company expenses. You want all employees to be able to submit expenses, but want certain Finance users to have more admin type of actions such as being able to approve or delete expenses. These actions can be mapped to [Permissions](#permissions) and then assigned to a certain Role.
You can create different types of Roles such as: Expense Admins, Expense Manager, and Expense User for your Expense Management Tool.
## Roles
The roles that you will create will depend on the access to certain permissions in your application. For example, let's say that you have an application that allows employees to enter in company expenses. You want all employees to be able to submit expenses, but want certain Finance users to have more admin type of actions such as being able to approve or delete expenses. These actions can be mapped to [Permissions](#permissions) and then assigned to a certain Role.
You can create different types of Roles such as: Expense Admins, Expense Manager, and Expense User for your Expense Management Tool.
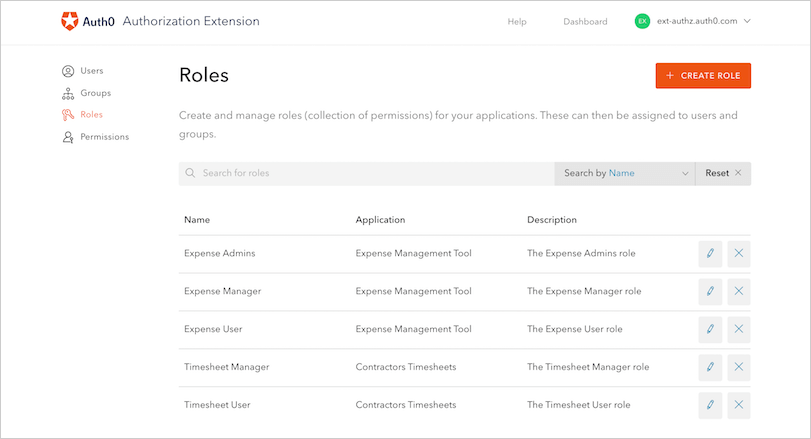 To add a role, click the **CREATE ROLE** button from the **Roles** section of the dashboard. Then choose the application this Role applies to (such as Expense Management Tool) and then add a name of the role (such as Expense Admins) and a description of the role. Then select the permissions you wish to grant to this role. If you haven't yet created your permissions you can add them later to an existing Role.
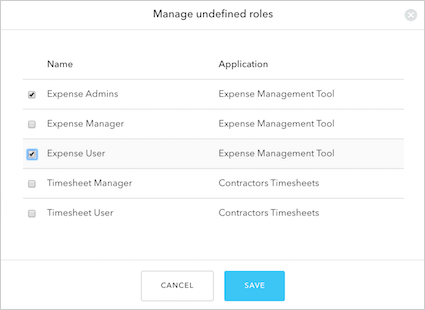 Once you have a **Role** created, you can add it to a user so they can then have the associated **Permissions**. To add a role to a user, find the user in the **Users** section, then click the **Roles** tab. Then click **ADD ROLE TO USER** to choose which roles you wish to assign to a user, then click **SAVE**.
## Permissions
Permissions are the actions or functions that can be added to Roles.
Using the previous example of an Expense application, let's look at possible roles and how they can be associated with certain permissions:
* Role: Expense User
* Permissions:
* View their own expenses
* Add a new expense
* Role: Expense Admin
* Permissions:
* Approve expenses
* View all user expenses
* Delete expenses
* Add a new expense
To create a new permission, go to the **Permissions** section of the Authorization Extension dashboard.
Once you have a **Role** created, you can add it to a user so they can then have the associated **Permissions**. To add a role to a user, find the user in the **Users** section, then click the **Roles** tab. Then click **ADD ROLE TO USER** to choose which roles you wish to assign to a user, then click **SAVE**.
## Permissions
Permissions are the actions or functions that can be added to Roles.
Using the previous example of an Expense application, let's look at possible roles and how they can be associated with certain permissions:
* Role: Expense User
* Permissions:
* View their own expenses
* Add a new expense
* Role: Expense Admin
* Permissions:
* Approve expenses
* View all user expenses
* Delete expenses
* Add a new expense
To create a new permission, go to the **Permissions** section of the Authorization Extension dashboard.
 Then click the **CREATE PERMISSION** button. Then enter the name of the permission, the description and select the application for which this permission applies.
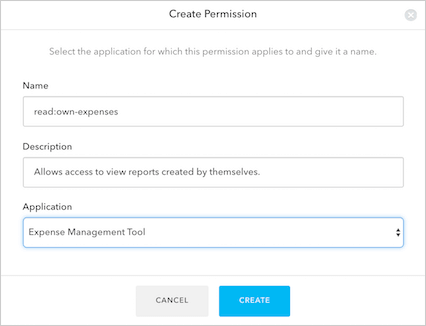 Once you have your permissions created, you can associate them with roles.
## Learn more
* [Configure Authorization Extension](/docs/customize/extensions/authorization-extension/configure-authorization-extension)
* [Enable API Access to Authorization Extension](/docs/customize/extensions/authorization-extension/enable-api-access-to-authorization-extension)
* [Import and Export Authorization Extension Data](/docs/customize/extensions/authorization-extension/import-and-export-authorization-extension-data)
* [Use Rules with the Authorization Extension](/docs/customize/extensions/authorization-extension/use-rules-with-the-authorization-extension)
Once you have your permissions created, you can associate them with roles.
## Learn more
* [Configure Authorization Extension](/docs/customize/extensions/authorization-extension/configure-authorization-extension)
* [Enable API Access to Authorization Extension](/docs/customize/extensions/authorization-extension/enable-api-access-to-authorization-extension)
* [Import and Export Authorization Extension Data](/docs/customize/extensions/authorization-extension/import-and-export-authorization-extension-data)
* [Use Rules with the Authorization Extension](/docs/customize/extensions/authorization-extension/use-rules-with-the-authorization-extension)